Step 2
How to Assemble Your DIY Home Snowmaker
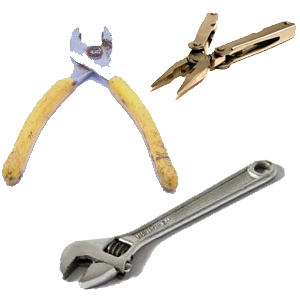
A) Gather Your Tools
Time Required - 3:00
Whatever you use, it's best to have two in order to get the leverage on both parts you are connecting to get them to screw together tightly.
Any combination of the following will work:
- Pliers
- Crescent Wrench
- Adjustable Crescent Wrench
- Channel Locks
- Monkey Wrench
- Vise Grips
- Socket Set (for nozzles)
How tight is tight enough? If your snowmaker leaks, it's not tight enough :)
B) Wrap All Male Threads w/ Teflon Tape
Time Required - 15:00
Tear off a piece of teflon tape about 6" long. Looking at the opening of the end you are wrapping, wrap the tape clockwise around the pipe. This way, when you screw parts together, the screws tighten the tape and provide a good seal.
Repeat on all threads.
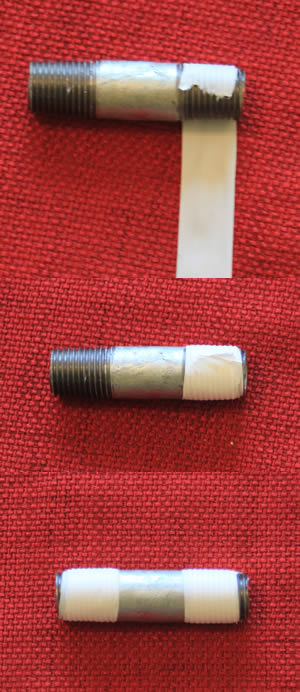
C) Screw the Snowmaker Together
Time Required - 15:00
Screw all the parts together tightly (especially the parts above the valve) using a couple of wrenches according to the diagram on the right.
Nozzle openings should be parallel to the ground.

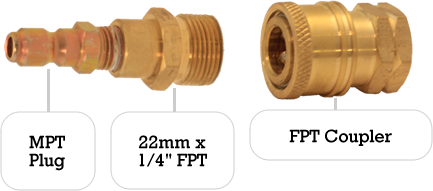
C) Assemble Connectors
Time Required - 15:00
Screw the 22mm 1/4" FPT to the MPT plug. This coupler will attach to the end of your pressure washer hose. The leftover FPT coupler will attach to the end of your air hose instead of a typical air hose quick connector that tends to freeze up in cold temps.